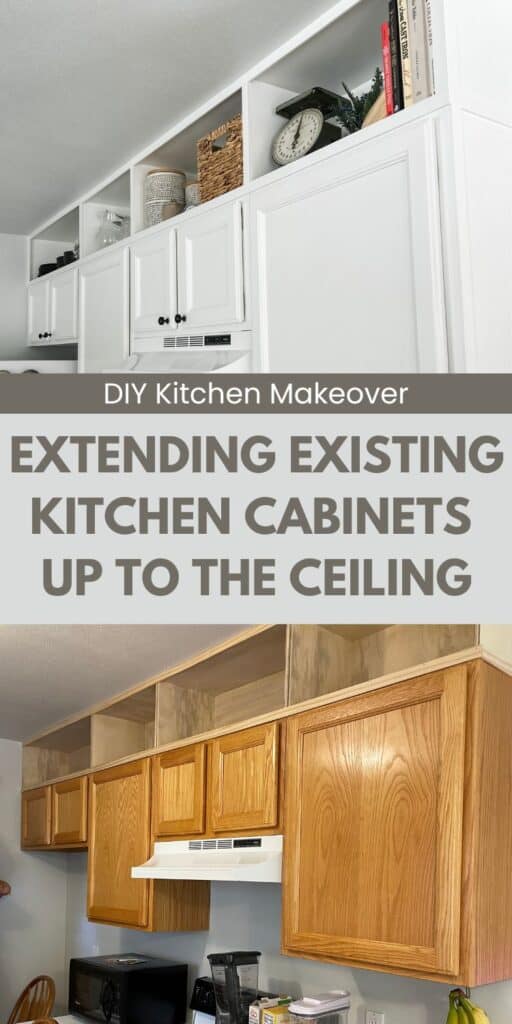
Are you thinking about extending your kitchen cabinets to the ceiling? This is a great home DIY project to add extra storage space, maximize dead space, and upgrade your kitchen on a budget! Take a look!
You’re in the right place if you’re looking for a budget-friendly kitchen makeover idea.
We were in a similar place with our outdated, small kitchen and needed to figure out how to make it our own without spending a fortune.
That’s when I started looking up different ways to upgrade our kitchen’s look and feel using the existing cabinets.
You see, kitchen cabinets can be expensive, so new cabinetry was out of the question, but we realized you don’t need to buy brand-new cabinets to give your kitchen an updated and efficient look!
You’d be surprised at how much impact some paint and simply extending your existing cabinets to the ceiling can have – it’s a great way to give any kitchen an instant facelift.
If you’re feeling ambitious, this is a perfect DIY project that can transform the space without having too big of an impact on your wallet.
I didn’t keep track (I’m terrible at that! … see other posts about my ADHD), but I think we spent less than $1500, and the final result looks like we spent so much more.
In this blog post, I’ll share helpful tips and tricks for this home improvement project so you can start your own DIY transformation in no time.
This post is all about extending kitchen cabinets to the ceiling.
Extending Kitchen Cabinets to the Ceiling
Disclaimer: Please be advised that this post is intended solely for inspirational purposes to provide you with ideas for your own home. It is not intended as a step-by-step tutorial. While we have a passion for DIY and possess some handy skills, we are not professionals. We want to share what has worked well for us. It is worth mentioning that while this project was relatively straightforward to complete if you lack experience in DIY projects, we highly recommend seeking professional assistance to ensure proper execution.
Getting Started
When we started this DIY project, I wasn’t sure if we could pull it off.
I had read a couple of posts about extending kitchen cabinets to the ceiling, and it seemed easy enough, but this was by far the biggest project we had attempted to tackle, and I thought it would surely end up as one of those #pinterestfail moments.
For months, I debated whether we should fill in the space on top of the cabinets or raise the cabinets to ceiling height and fill in with some open shelving underneath.
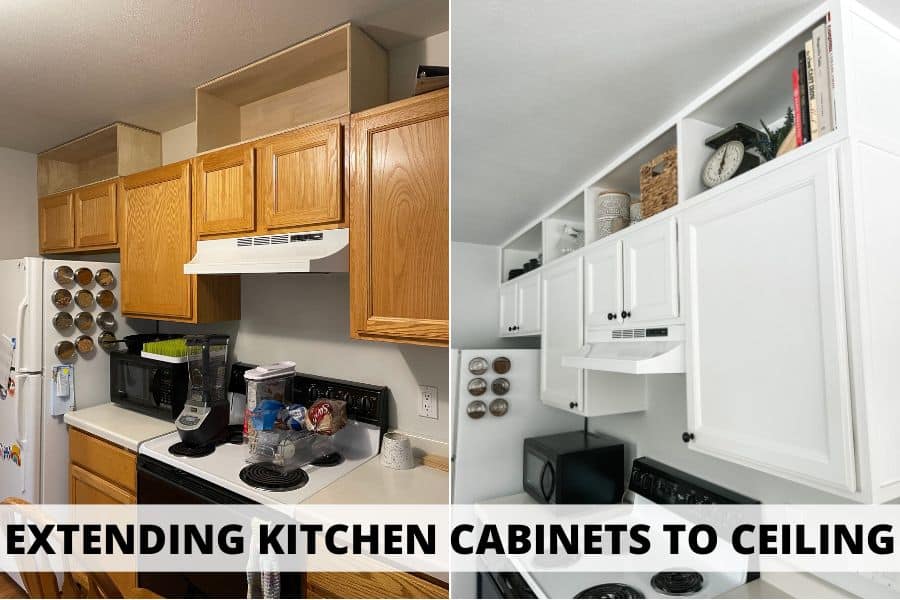
After much deliberation, we decided it would be best to keep the cabinets exactly where they were and create some built-ins on top of the existing cabinets to extend them up to the ceiling.
Not only would this be easier to do, but it was also more practical because raising the cabinets higher on the wall would have made it difficult to reach the highest shelves without purchasing entirely new, taller cabinets.
Overall, the goal of this project was to create a little bit of extra storage space in our kitchen and make as big of a design impact as possible with as little money as possible.
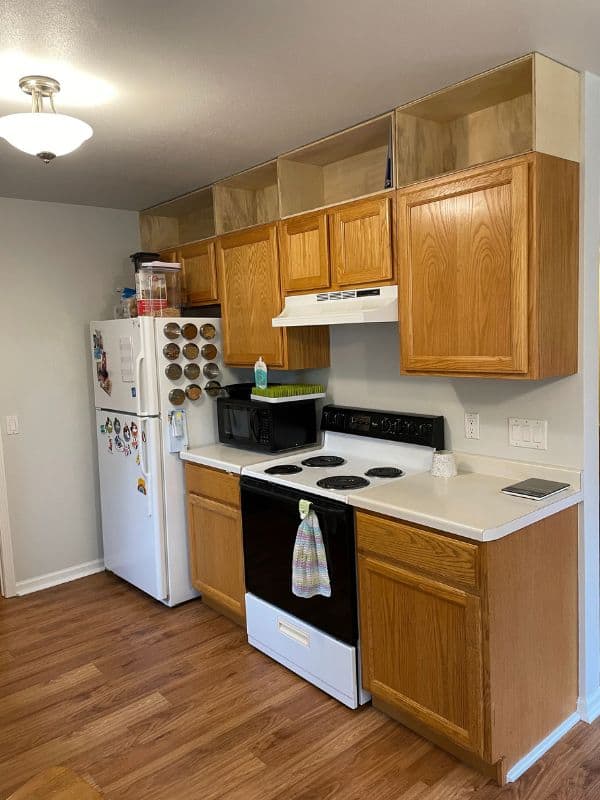
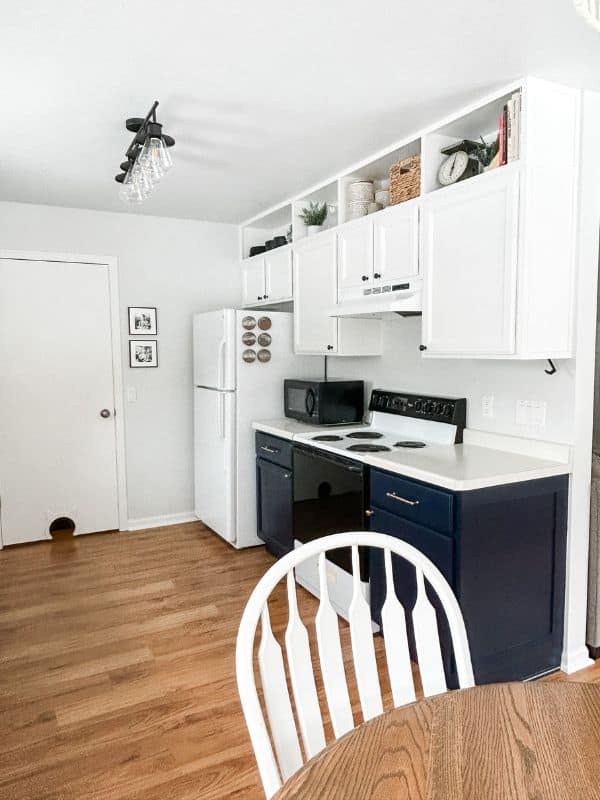
The Before

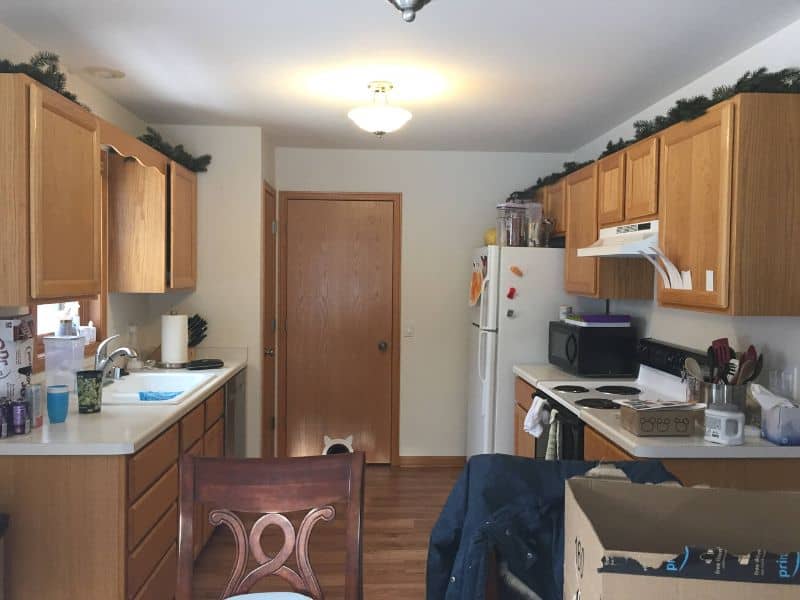
Don’t mind the mess or the mediocre Christmas decorations that were probably still up in February.
The images above were the best “before” pictures I could find, and I needed to include them so you could see the amazing transformation.
When we first moved in, I HATED our kitchen!
It’s a small kitchen, and the short wood cabinets and doors made it look even smaller.
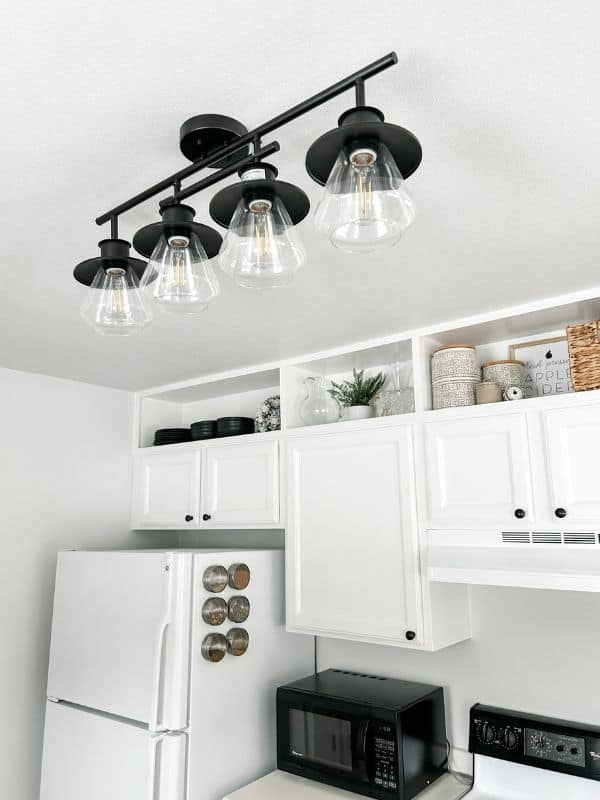
I was not too fond of the outdated valence over the sink, the extra space above the tops of the cabinets, the countertops, the light fixtures, etc.
It all felt like a drab rental property and not like my home.
With a limited budget, I knew I wouldn’t be able to change everything on my wish list.
I wouldn’t be able to change the configuration of anything, buy new appliances, a new range hood, or new cabinets, and would need to keep the same old countertops, so I had to be creative.
After much research, raising the cabinets to the ceiling and some new paint colors seemed to be the best option for this total kitchen renovation on a tight budget.
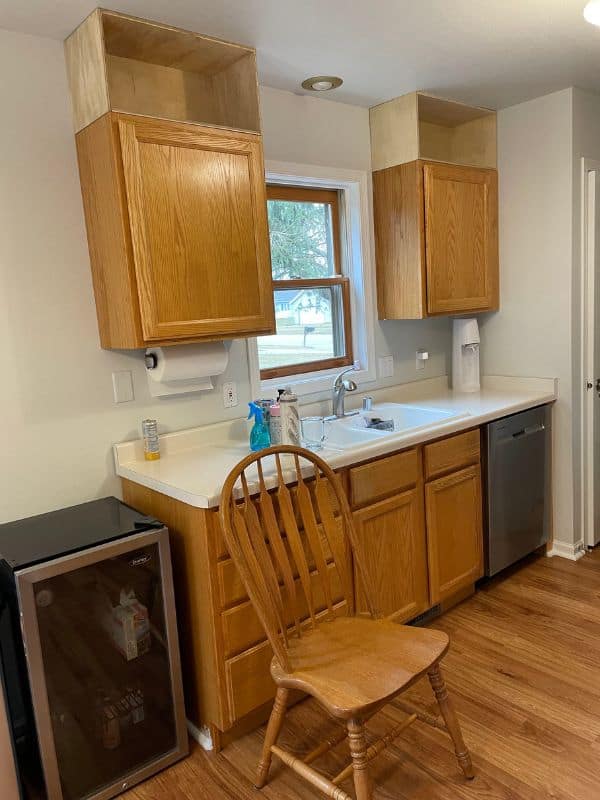
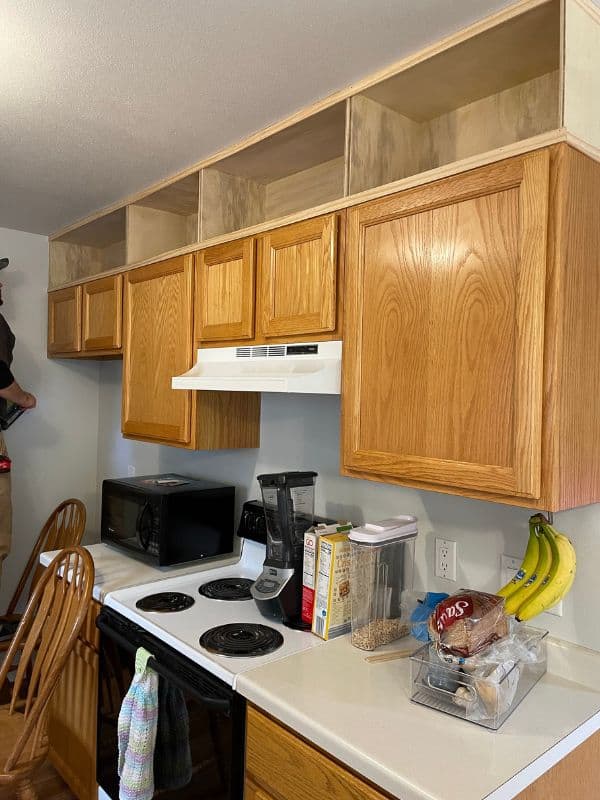
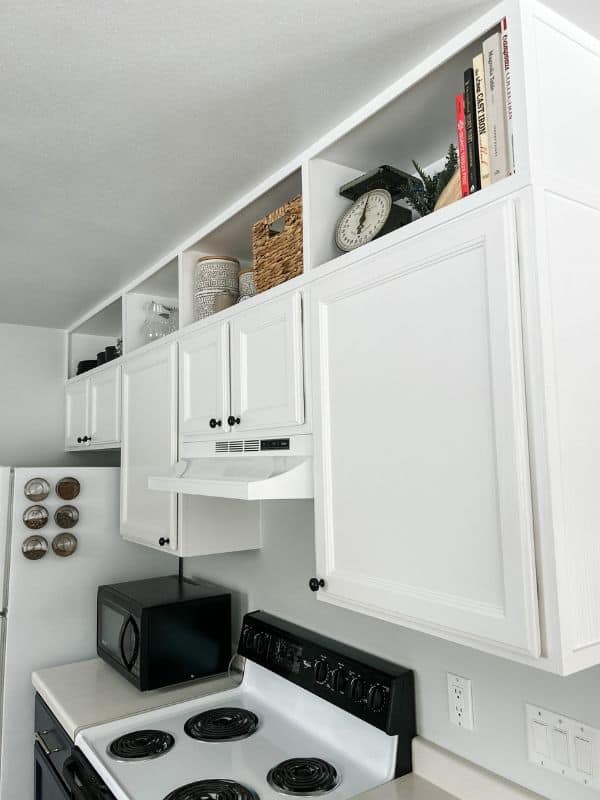
Step 1: Building the Boxes
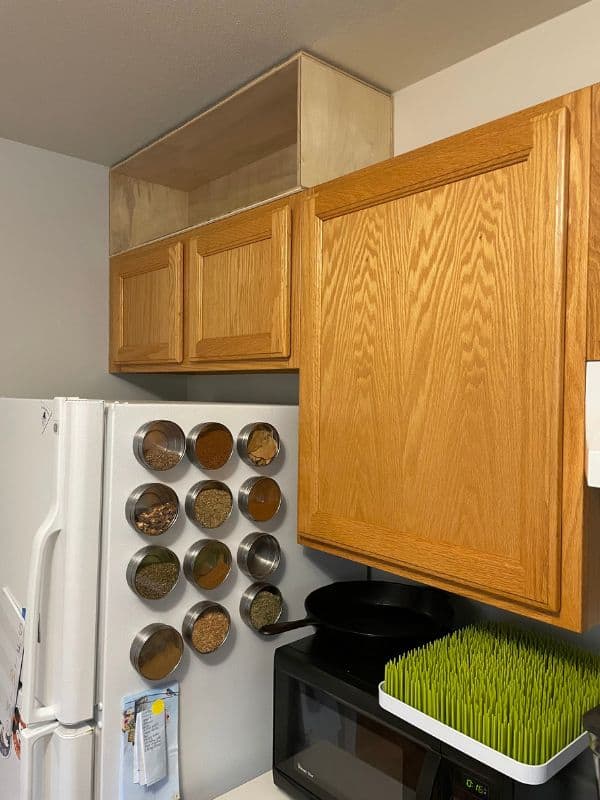
To achieve a new built-in look for our builder-grade cabinets, we first built a simple plywood box that fit above each of the cabinets.
The trickiest part about this was making sure to get the right measurements.
Our ceiling is not perfectly level (as most aren’t, especially in older homes), so we had to measure the height needed for each box individually.
For instance, our boxes above the cabinets over the fridge needed to be slightly over 11 inches tall, and the boxes on the other side of the wall needed to be close to 12 inches tall.
That’s almost a whole inch difference!
You don’t really notice those things when you look at a room, but it makes a big difference, and it would be very frustrating to build all of your boxes the same size and then half of them don’t fit.
Yikes, that would be an easy way to ruin a good day.
I guess that’s why they say, “Measure twice, cut once”.
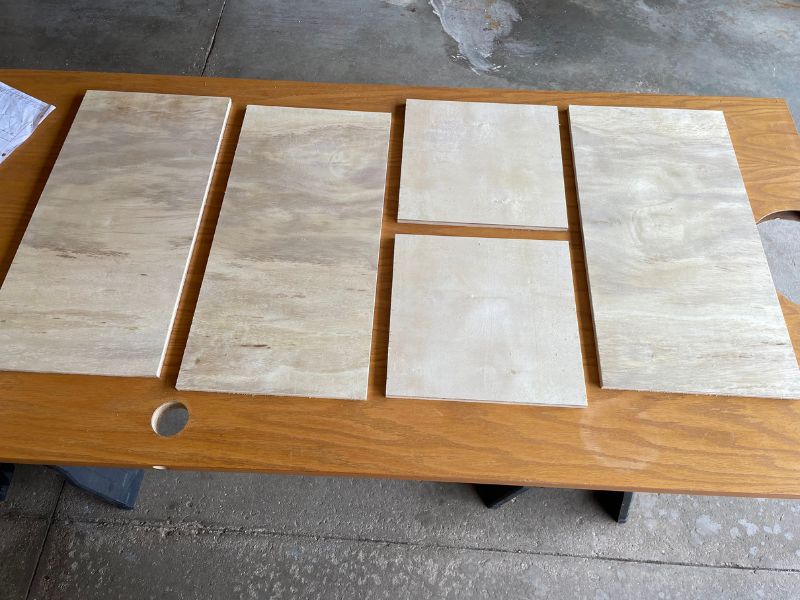
To build the boxes, we used a standard 1/2-inch piece of plywood.
We cut three longer pieces for the box’s back, top, and bottom. And two shorter pieces for the sides of the box.
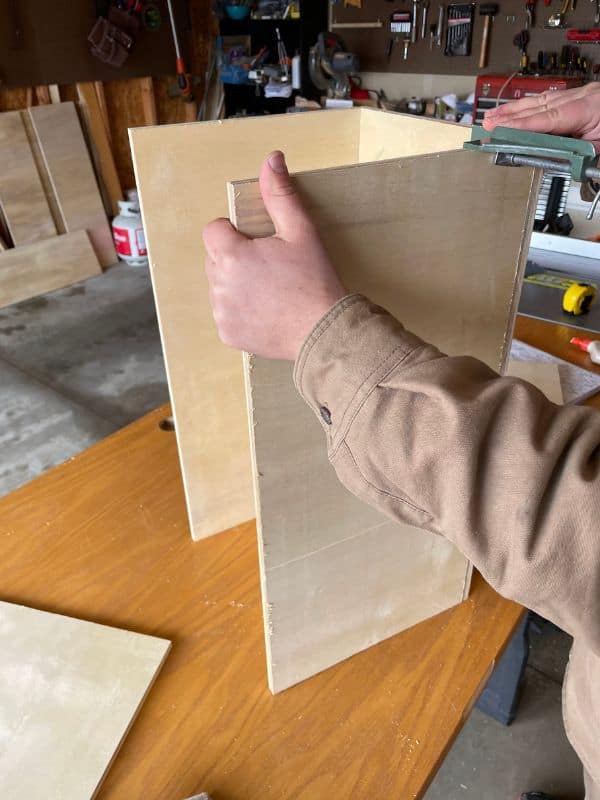
To put the boxes together, we found it helpful to use a right-angle clamp to ensure the corners were square.
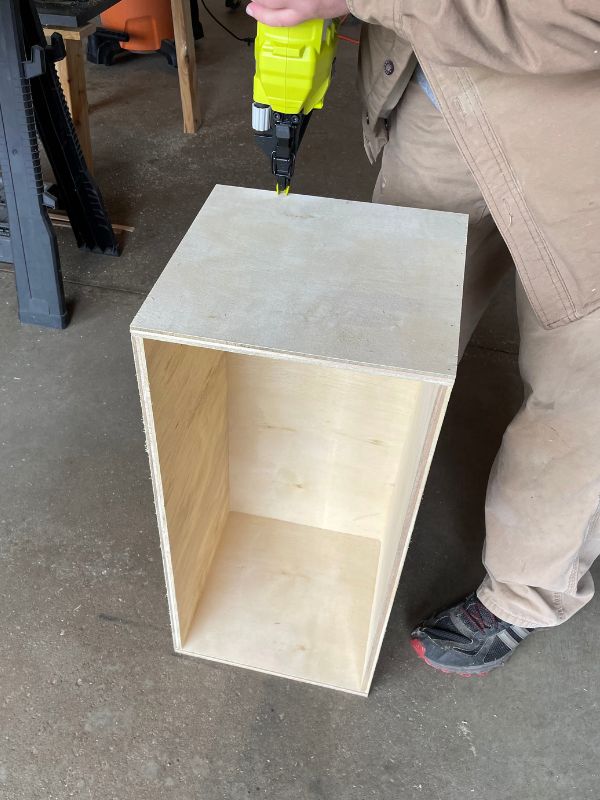
We then used wood glue on all the joints and secured the boards with a nail gun.
We LOVE this battery-operated brad nailer from Ryobi! It has come in handy for so many of our home DIY projects!
It’s been well worth the small investment.
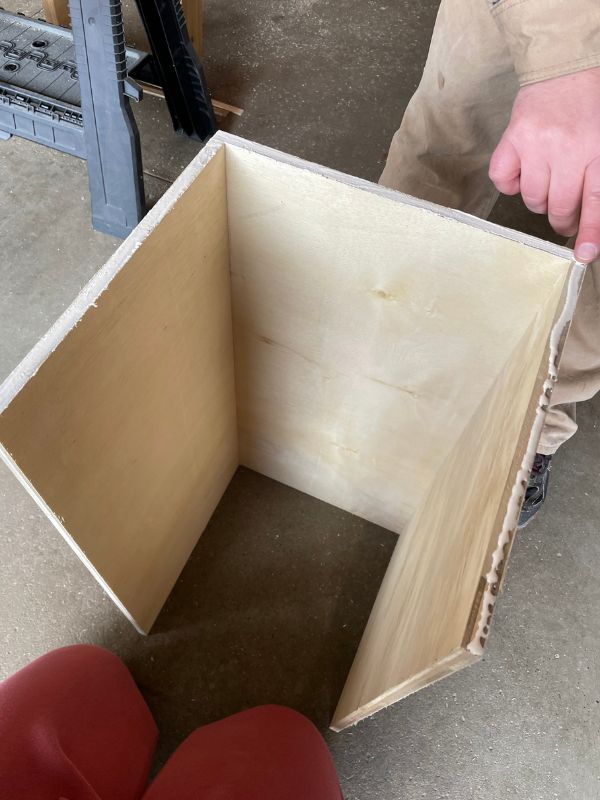

And voila! Your cabinet boxes are complete.
The boxes are now ready to be installed on top of your upper cabinets.
There’s no need to worry about the small nail holes; we’ll fill those in later!
Step 2: Installing the boxes on top of your cabinets
On to the fun part!
After all that time spent building six separate cabinet boxes, it was finally time to install the boxes.
This is always nerve-wracking as you hope and pray you did a good job measuring, and everything fits as you anticipated.
But it’s also the exciting part because you finally get to see your vision coming to life.
The actual installation of the boxes was pretty simple.
We just put the boxes above the wall cabinets they fit over and then used screws and our trusty power drill to attach them to the stud in the wall behind them.
We love our Milwaukee brand drill, but if you’re looking for something more affordable, we’ve also really enjoyed using our drill from Ryobi.
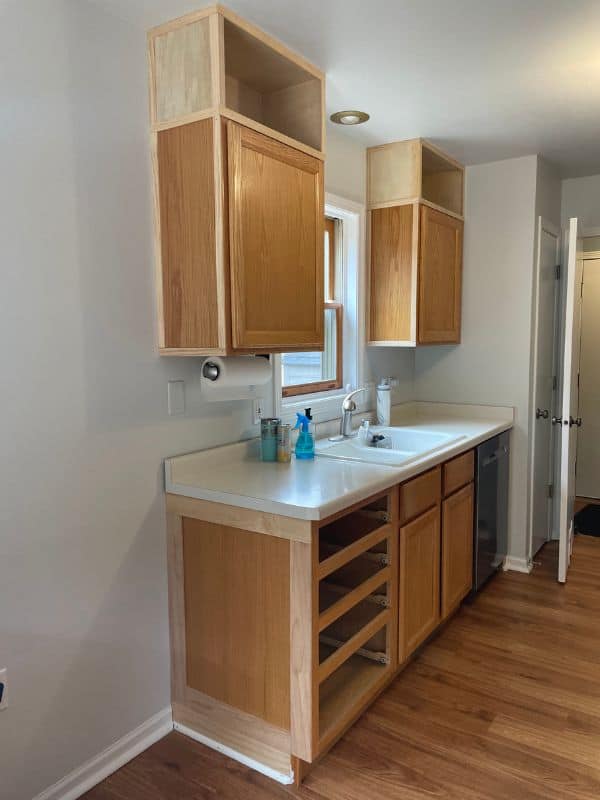
Step 3: Adding the Trim
Now it’s time for the finishing touches.
Some people will choose to built-up crown moldings at the top of the cabinets, but our ceilings aren’t very high in the kitchen, so we didn’t have much extra space for trim.
For this reason, we opted to go with basic 1-inch trim pieces along all the edges to cover the seams.
This also matched the trim we used for the shiplap wall in our mudroom.
We first trimmed the horizontal lines and attached them with some wood glue and our nail gun.
You may think you don’t need the glue if you’re also using nails, but nails aren’t all that strong (especially these small brad nails), and the glue will help to prevent the trim from warping.
After putting trim around the new cabinet boxes, we decided to extend the trim down the sides of the top cabinets and lower cabinets to give the kitchen a more cohesive and custom look.

Once all the trim was complete, we used some painter’s caulk along all the edges and seams.
We also used it to fill in all the small nail holes.
Caulking is a step many amateur DIY’ers skip, but I think it’s one of the most critical steps to achieve a professional look.
It’s time-consuming, especially with tons of seams, like in this kitchen project, but it’s so worth it.
Step 4: Paint and admire!
After the caulk was dry, we painted the cabinets with the Sherwin Williams Emerald Urethane Trim Enamel paint in the colors “pure white” on top and “anchors away” on the bottom.
We then filled the upper boxes with various decorative elements like baskets and small kitchen items to add some coziness to the space.
This project finally gave us a place to store the nice dishes we received for our wedding several years ago.
Overall, extending your kitchen cabinets to create ceiling-height kitchen cabinets is an excellent choice if you’re looking for an affordable way to fill in the space on the tops of your cabinets.
[RELATED: Navy and White Kitchen Cabinets | DIY Two Tone Kitchen Transformation]
Concluding Thoughts
The transformation we made to our old cabinets turned out stunning!
Painting the cabinets and installing some open shelves changed our whole kitchen feel and took our home decor up a big notch.
All this without having to buy custom cabinets or special ceiling-height kitchen cabinets.
I’d say that’s a win!
We hope this blog post will inspire you and other homeowners looking for ways to spruce up their space without breaking the bank.
And, if you liked this, be sure to check out our other affordable home DIY projects like our board and batten entryway or our mudroom bench project!
Shop Our New Kitchen Look
Pin this post to share and save for later!