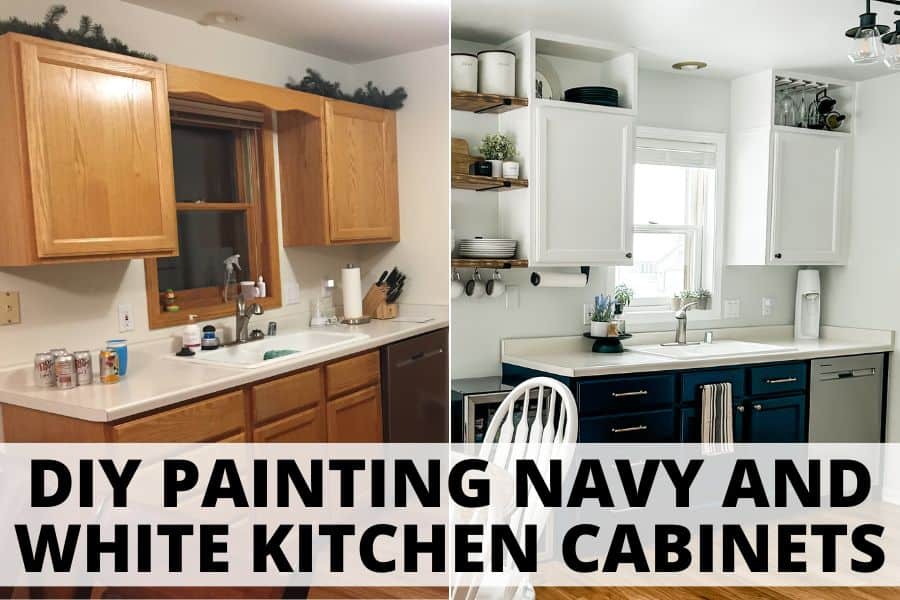
Get inspired by these beautiful navy and white kitchen cabinets! See the before-and-after photos of this gorgeous two-toned DIY project and tips on how you can get the look today!
When you walk into your kitchen, do you feel like something is missing?
Does it look outdated, drab, or just too plain?
If so, you’re in the right place!
When we decided to update our own kitchen, going with navy base cabinets and white upper cabinets was transformative.
Not only did they add a modern touch to our space, but the two-toned design gave us a new fresh look.
If you’re considering giving your kitchen a facelift yourself, stay tuned for how we tackled this DIY painting project as well as some of the mistakes we made along the way.
It’s a great way to easily create your dream look without spending too much money.
This post is all about painting navy and white kitchen cabinets.
⬇️Pin for Later⬇️

Painting Navy and White Kitchen Cabinets
When it came time to paint our kitchen cabinets, I wrestled with what color to paint them.
We had already extended the cabinets to the ceiling, which if you haven’t seen that post yet, definitely check it out!
And now it was time to pick colors.
Personally, I really wanted all white cabinets in the kitchen.
I like light and bright spaces in my home so dark colors scare me, and I was nervous that navy cabinets would make our already small space look even smaller.
However, after we painted the walls the gorgeously bright Fleur de Sel color from Sherwin Williams and the woodwork around the cabinets white, I realized the kitchen could benefit from some contrast and darker shades.
With all the natural light we get in the space, I was feeling better about the rich navy color and so it was settled, dark blue cabinets it is!
[RELATED: DIY Extending Kitchen Cabinets to the Ceiling on a Budget]
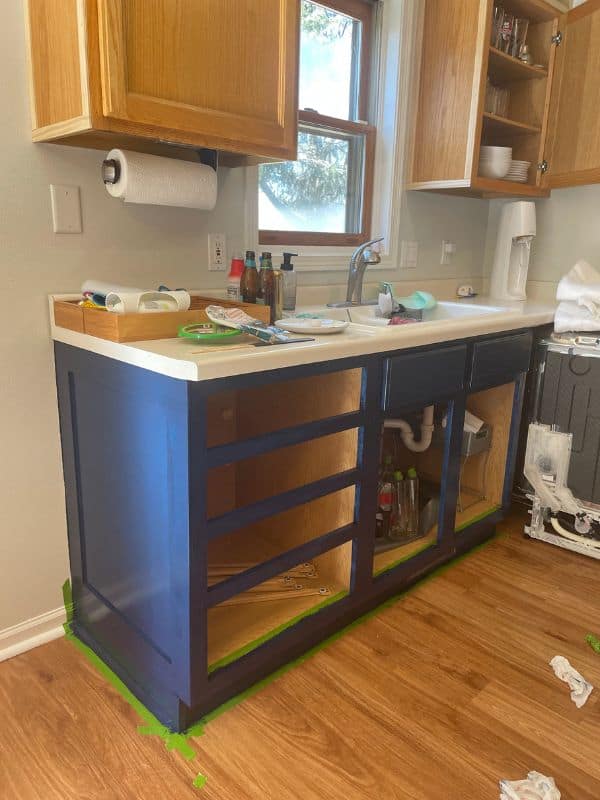
Painting the lower cabinets
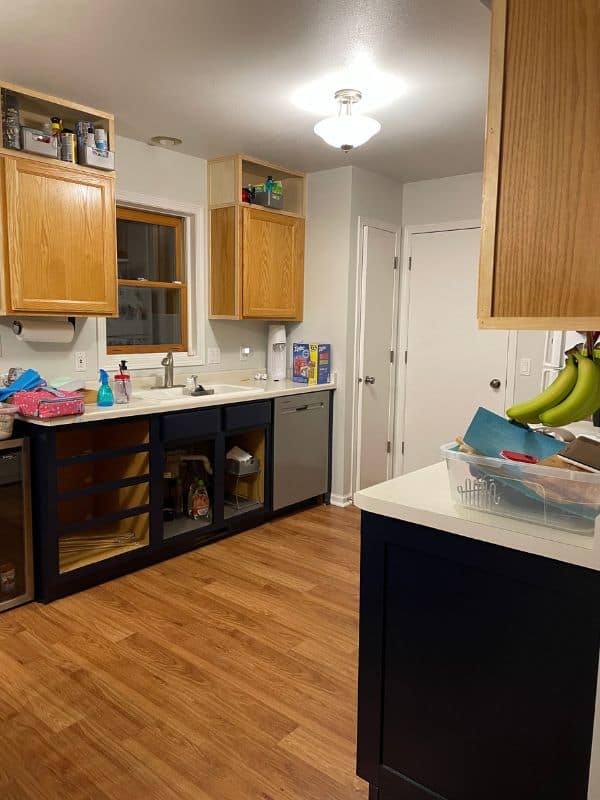
We opted to paint the lower cabinets first as this seemed like the most daunting part of the project.
Due to the nature of the cabinets being within arm’s reach of our toddler, we had to get that painting done at a time when our 3-year-old would not be home.
We also had to pull out all of the appliances including the dishwasher, oven, and range hood so our kitchen was pretty much unusable until we finished the bottom cabinets.
First, (after cleaning the cabinets really well of course!) we painted two coats of primer using the Sherwin Williams Extreme Bond Primer.
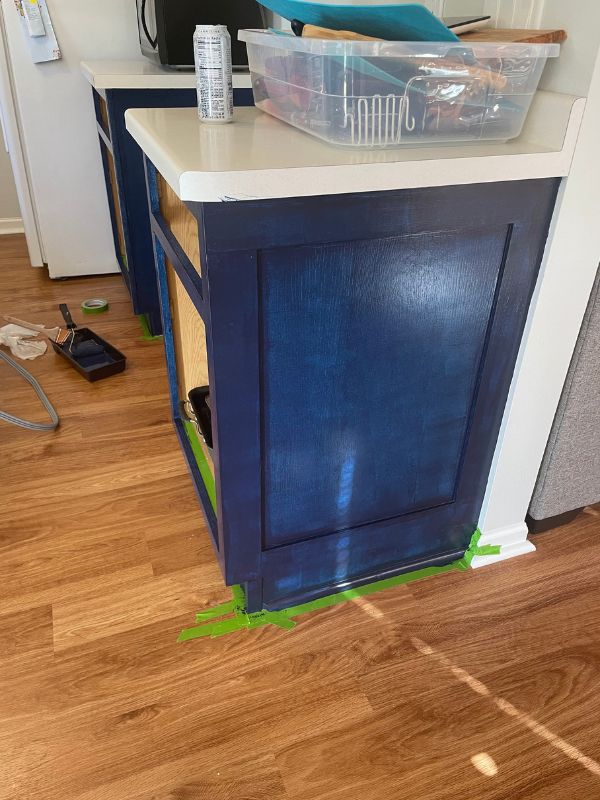
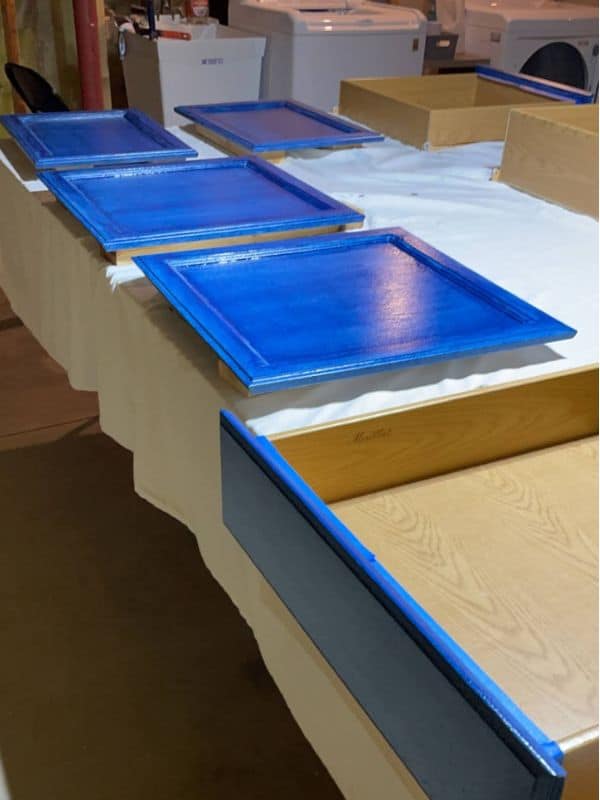
For the blue lower cabinets, we used Sherwin Williams Emerald Urethane Trim Enamel in the paint color Anchors Away.
Here’s where I made a really big mistake!
I almost always choose neutral tones and light colors in my house so I had no experience with painting such a deep color.
I purchased the primer in the typical pure white color we used for all the other woodwork in our house, such as our fireplace remodel and board and batten wall.
Do you know what I did wrong yet?
Well, you see, I should have had the store tint the primer for such a dark color.
Of course, I realized this after we had to paint 5 COATS! of the navy color before I got the beautiful, rich, dark blue kitchen cabinets I was looking for.
After one coat, we lovingly named these our “Blue Horse, Blue Horse” cabinets after one of our daughter’s favorite “Brown Bear, Brown Bear” books and I’d be lying if I said I wasn’t nervous we just completely destroyed our kitchen.
Dark colors like this are always going to take more coats than lighter shades to achieve proper coverage but I probably could have eliminated at least one, if not two of those coats if I had started off the base with a darker primer color.
Luckily our navy kitchen still turned out beautifully in the end, and it was a learning opportunity for all.
Painting the upper cabinets
After several coats of paint, we had finally completed the lower cabinets and it was time to move on to painting the white upper cabinets.
For the white cabinet color, we again used Sherwin-Williams Emerald Urethane Trim Enamel in the color Pure White, the same color we used for all the doors, windows, and trim throughout our house.
We painted two coats of primer and two coats of white paint.
The hardest part about painting the upper cabinets was painting the boxes up top.
Due to the proximity to the ceiling, it resulted in having to stand in an awkward hunched-over way in order to reach all the back edges and corners.
It definitely was not an easy task for our backs.


The Kitchen Reveal
Overall, painting the two tone kitchen cabinets created a stunning look in our kitchen for a fraction of the price of new cabinetry.
Eventually, I would like to replace the countertop with a white quartz countertop and purchase stainless steel appliances.
Maybe I’ll even have an open concept kitchen someday.
But, those upgrades aren’t in the budget quite yet, and they may never be.
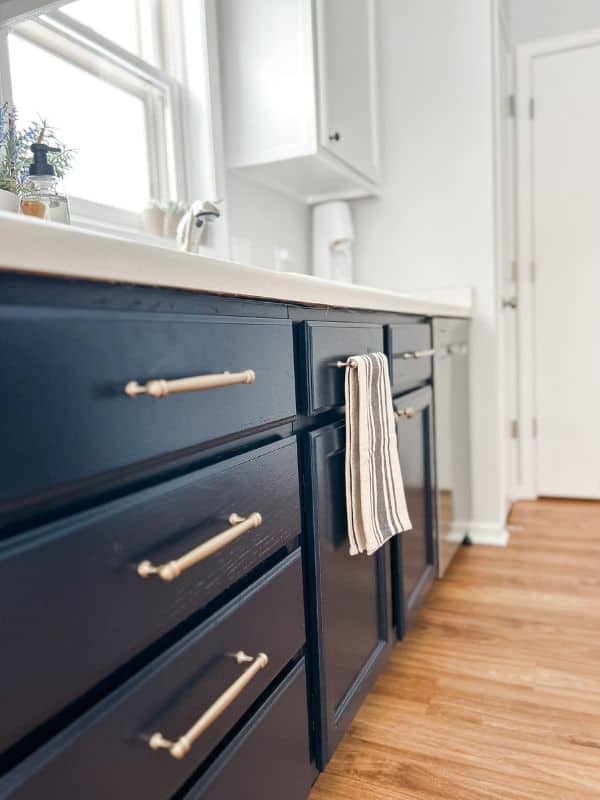
Once everything was painted and the cabinet doors reattached, we added some black and gold hardware which gave the kitchen an elegant look.
The bold navy color is the perfect shade and I absolutely love the color scheme.
It’s a modern look but still feels very timeless and classic.
To create additional storage space, we also added some floating wood shelves as open shelving on the ends of the cabinets.
These provide an extra touch of design and allowed us to move our plates, bowls, and other items in order free up some extra cabinet space.
A huge win for our small kitchen!


Shop This Kitchen Look
Pin this post to share and save for later!

